“1.1 sMonitor ubuntu开发平台”的版本间的差异
来自小蚁工场,专注嵌入式、物联网与人工智能技术。
(→动手实践) |
|||
| 第7行: | 第7行: | ||
------- | ------- | ||
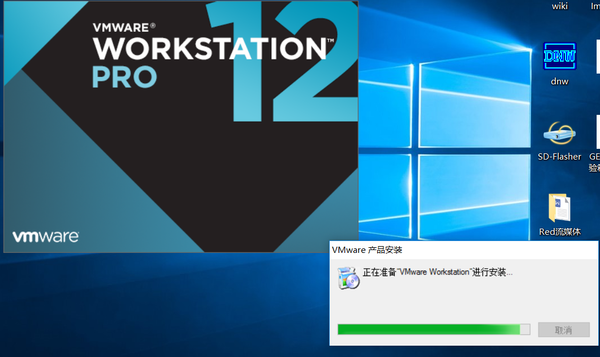
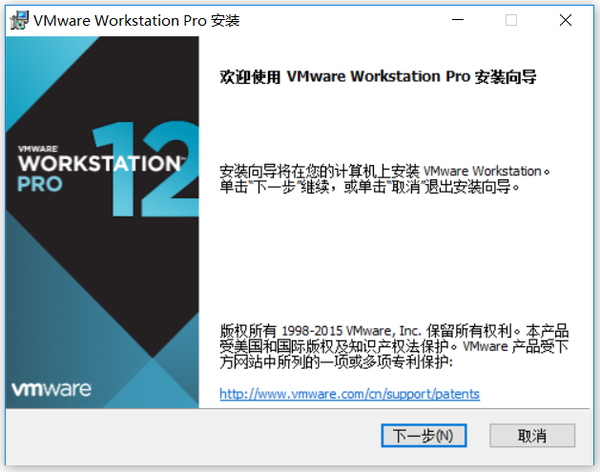
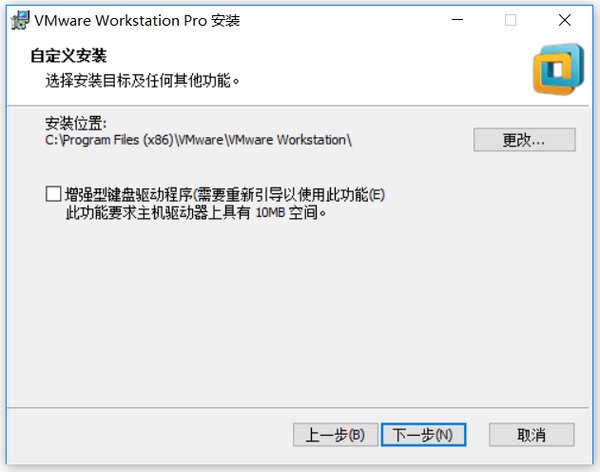
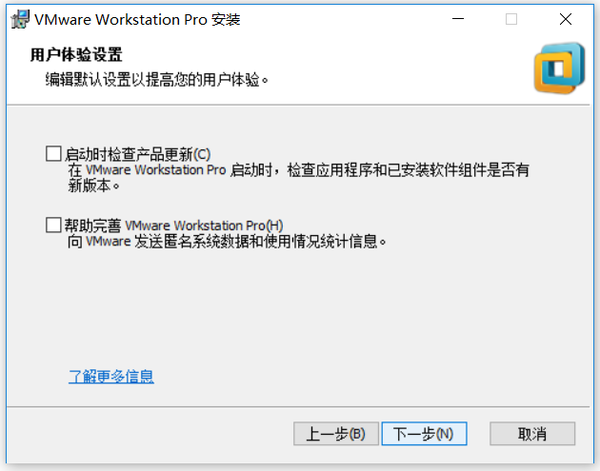
| − | === | + | ===vmware软件安装=== |
软 件 包:VMware-workstation-full-12.0.0.zip | 软 件 包:VMware-workstation-full-12.0.0.zip | ||
| 第66行: | 第66行: | ||
<br> | <br> | ||
| − | === | + | |
| + | 【VirtualBox加载Ubuntu||VirtualBox加载Ubuntu】 | ||
| + | |||
| + | ===ubuntu安装配置=== | ||
<pre> | <pre> | ||
| − | 软 件 包:64bitPlatform_1604_v5.0.zip | + | 软 件 包:64bitPlatform_1604_v5.0.zip(也可能是其他版本) |
操作系统:windows-7/8/10 | 操作系统:windows-7/8/10 | ||
安装过程: 如下所示 | 安装过程: 如下所示 | ||
| 第74行: | 第77行: | ||
====安装ubuntu系统==== | ====安装ubuntu系统==== | ||
| − | * | + | *在d盘创建一个myMachine目录 |
| − | *将64bitPlatform_1604_v5.0. | + | *将64bitPlatform_1604_v5.0.zip拷贝到myMachine目录 |
*解压64bitPlatform_1604_v5.0.zip到当前目录下 | *解压64bitPlatform_1604_v5.0.zip到当前目录下 | ||
| 第134行: | 第137行: | ||
====设置共享目录==== | ====设置共享目录==== | ||
| − | * | + | 共享目录主要是用于实现windows与ubuntu两个系统之间的数据交互,比如windows有一个文件要给ubuntu系统用时,就可以将文件放置到共享目录下传给ubuntu。 |
| + | '''新的共享目录可以如下配置:''' | ||
| + | |||
| + | *在windows桌面新建名为shareWin的目录文件,并且在里面创建一个名为hello的文件 | ||
| − | + | [[File:gbaSet_01.png|600px]] | |
| − | + | *回到ubuntu系统的shell操作界面,进行如下操作 | |
| − | |||
| − | + | # ls /mnt/hgfs | |
| + | 可以看到没有名为shareWin的目录文件,接下来做如下操作: | ||
| − | [[File: | + | [[File:gbaSet_02.png|600px]] |
| + | |||
| + | [[File:gbaSet_03.png|600px]] | ||
| + | |||
| + | [[File:gbaSet_04.png|600px]] | ||
*再次执行 | *再次执行 | ||
| − | + | # ls /mnt/hgfs | |
| + | # cd /mnt/hgfs/shareWin/ | ||
| + | # ls | ||
| − | 发现在/mnt/ | + | 发现在/mnt/hgfs目录下,多了一个名为shareWin的目录文件,再进到里面可能看到之前创建的hello文件。 |
| + | |||
| + | 至此,两个系统间的共享文件夹设置并启完毕,后面如果两个系统需要共享资料时,可以将其放到共享目录即可。 | ||
| + | |||
| + | <br> | ||
| + | |||
| + | ====网络配置连接==== | ||
| + | |||
| + | *电脑windows连接上网络(可以是有线网络,也可以是无线网络,推荐无线) | ||
| + | |||
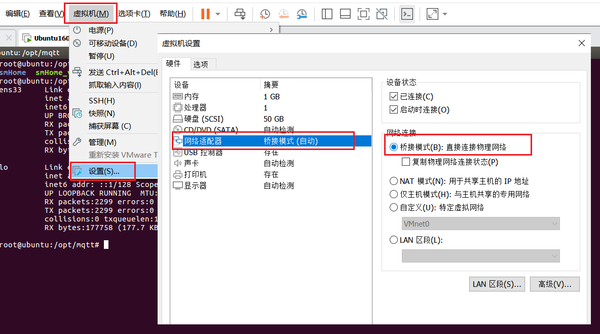
| + | *检查设置ubuntu为桥接网络连接方式 | ||
| + | |||
| + | [[File:vmware_netset_01.png|600px|link= ]] | ||
| + | |||
| + | 注意:必须设置为桥接方式。 | ||
| + | |||
| + | |||
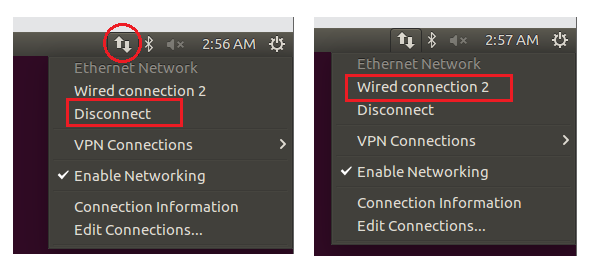
| + | *重启ubuntu网络 | ||
| + | |||
| + | [[File:vmware_netset_02.png|600px|link= ]] | ||
| + | |||
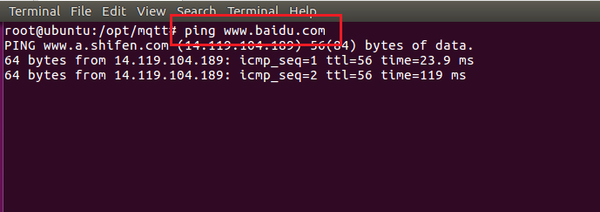
| + | *测试网络是否可联网 | ||
| + | |||
| + | [[File:vmware_netset_03.png|600px|link= ]] | ||
| + | |||
| + | 如果可以ping通百度,则网络配置成功。 | ||
<br> | <br> | ||
| 第179行: | 第216行: | ||
====常用shell命令==== | ====常用shell命令==== | ||
| − | + | ||
此处略 | 此处略 | ||
| − | |||
| + | <!-- | ||
*cd(改变工作路径) | *cd(改变工作路径) | ||
:cd xxx (xxx:是工作目录的路径) | :cd xxx (xxx:是工作目录的路径) | ||
| 第365行: | 第402行: | ||
tar -zcf vmware-tools-distrib.tar.gz vmware-tools-distrib | tar -zcf vmware-tools-distrib.tar.gz vmware-tools-distrib | ||
| + | --> | ||
====实践操作==== | ====实践操作==== | ||
| 第370行: | 第408行: | ||
<pre> | <pre> | ||
| − | #mkdir /opt/shell_test | + | # mkdir /opt/shell_test //在opt目录下新建一个名为shell_test文件 |
| − | # | + | # ls /opt/shell_test //查看/opt/shell_test目录 |
| − | # | + | # cd /opt/shell_test //进入/opt/shell_test目录 |
| − | #mkdir hello | + | # mkdir hello //新建一个名为hello目录 |
| − | #ls | + | # ls //查看当前目录内容 |
| − | #rmdir hello | + | # rmdir hello //删除hello目录 |
| − | #ls | + | # ls |
| − | #touch hello.c | + | # touch hello.c //创建一个hello.c文件 |
| − | #ls | + | # ls |
| − | #rm hello.c | + | # rm hello.c //删除hello.c文件 |
| − | #mkdir hello | + | # ls |
| − | #touch hello/hello.c | + | # mkdir hello |
| − | #touch world.c | + | # touch hello/hello.c //在hello目录下新建一个hello.c文件 |
| − | #ls | + | # touch world.c //新建world.c文件 |
| − | #rm -rf ./* | + | # ls |
| − | #ls | + | # rm -rf ./* //删除当前目录下所有文件 |
| + | # ls | ||
</pre> | </pre> | ||
| 第392行: | 第431行: | ||
<pre> | <pre> | ||
| − | #cd /opt/shell_test | + | # cd /opt/shell_test //进入/opt/shell_test目录下 |
| − | #ls | + | # touch hello.c //新建hello.c |
| − | #chmod 777 hello.c | + | # ls |
| − | #ls | + | # chmod 777 hello.c //修改hello.c文件为可读写 |
| + | # ls | ||
| − | #cp hello.c hello_backup.c -rdf | + | # cp hello.c hello_backup.c -rdf //将hello.c拷贝保存为一个新文件hello_backup.c |
| − | #ls | + | # ls |
| − | #mv hello_backup.c 123.c | + | # mv hello_backup.c 123.c //将hello_backup.c改名为123.c |
| − | #ls | + | # ls |
| − | #mkdir test | + | # mkdir test |
| − | #mv 123.c test | + | # mv 123.c test //将123.c文件移到test目录下 |
| − | #mv test smartHome | + | # mv test smartHome //将test目录改名为smartHome |
| − | + | # ls | |
| − | #tar cvfj smartHome.tar.bz2 smartHome | + | # tar cvfj smartHome.tar.bz2 smartHome //将smartHome目录压缩为smartHome.tar.bz2文件 |
| − | #ls | + | # ls |
| − | #rm -rf smartHome | + | # rm -rf smartHome |
| − | #ls | + | # ls |
| − | #tar xvfj smartHome.tar.bz2 | + | # tar xvfj smartHome.tar.bz2 //将smartHome.tar.bz2文件解压为smartHome目录 |
| − | #ls | + | # ls |
</pre> | </pre> | ||
| − | + | *实践3: 编辑、编译及执行代码 | |
| − | |||
| − | |||
| − | |||
| − | * | ||
<pre> | <pre> | ||
| − | #cd /opt/shell_test | + | # cd /opt/shell_test |
| − | #rm -rf ./* | + | # rm -rf ./* |
| − | #touch hello.c | + | # touch hello.c |
| − | #vi hello.c | + | # vi hello.c |
可以进入文件中,按下i,就可以编辑内容 | 可以进入文件中,按下i,就可以编辑内容 | ||
#include <stdio.h> | #include <stdio.h> | ||
| + | #include <unistd.h> | ||
int main() | int main() | ||
{ | { | ||
| − | printf("hello world.\n"); | + | while(1) |
| + | { | ||
| + | printf("hello world.\n"); | ||
| + | sleep(1); | ||
| + | } | ||
| + | |||
return 0; | return 0; | ||
} | } | ||
| 第440行: | 第482行: | ||
:wq! (保存退出) | :wq! (保存退出) | ||
| − | #gcc hello.c -o hello | + | # gcc hello.c -o hello // 将hello.c编译为hello |
| − | #./hello | + | # ./hello // 执行可执行文件hello |
| + | </pre> | ||
| − | < | + | <br> |
===动手实践=== | ===动手实践=== | ||
| − | * | + | *练习1:在ubuntu下面安装一种软入法(如:五笔输入法)软件并简单使用 |
| − | * | + | *练习2:在ubuntu下,实现不少于两种方法安装mplayer播放器软件 |
<!-- | <!-- | ||
'''方法一:利用apt-get机制安装删除mplayer播放器''' | '''方法一:利用apt-get机制安装删除mplayer播放器''' | ||
| 第466行: | 第509行: | ||
#mplayer 2.mp4 | #mplayer 2.mp4 | ||
</pre> | </pre> | ||
| + | --> | ||
| + | <!-- | ||
'''方法二:在ubuntu下面实现下载mplayer播放器源码并编译安装''' | '''方法二:在ubuntu下面实现下载mplayer播放器源码并编译安装''' | ||
<pre> | <pre> | ||
| 第484行: | 第529行: | ||
</pre> | </pre> | ||
--> | --> | ||
| + | |||
| + | *练习3:在ubuntu下通过u盘挂载实现一个短视频的播放。 | ||
<!-- | <!-- | ||
| − | * | + | *练习4:配置网络并测试ping通百度, 并且通过网络安装QQ软件 |
| − | |||
| − | |||
--> | --> | ||
| + | |||
<!-- | <!-- | ||
| + | <div style="font-size: 120%;">'''资源下载'''</div> | ||
| + | {| class="wikitable" style="width: 90%;text-align: center" | ||
| + | | style="width="30%" | '''资源编号''' || style=width="20%" | '''资源名称''' || style=width="10%" | '''资源介绍''' || '''下载链接''' | ||
| + | |- | ||
| + | |1 || align=left | [[Media:ubuntu完整安装.pdf|ubuntu完整安装]] || align=left | ubuntu1604完整安装过程记录 密码:leqw || [[https://pan.baidu.com/s/1qZqCRC2ahBd3oT5xJbW2bQ 下载]] | ||
| + | |} | ||
| − | + | <br> | |
| − | |||
| − | |||
| − | |||
| − | |||
| − | |||
| − | |||
| − | |||
| − | |||
| − | |||
| − | |||
| − | |||
| − | |||
| − | |||
| − | |||
| − | |||
| − | |||
| − | + | --> | |
| − | |||
| − | |||
| − | < | + | 附录: |
| − | --> | + | ----- |
| + | {| class="wikitable" style="width: 100%;text-align: center" | ||
| + | | style="width="30%" | '''资源编号''' || style=width="20%" | '''资源名称''' || '''下载链接''' | ||
| + | |- | ||
| + | |1 || MPlayer-1.3.0.tar.xz || [[Media:MPlayer-1.3.0.tar.xz|mplayer源码包下载]] | ||
| + | |- | ||
| + | |2 || debug.mp4 || [[Media:debug.mp4|mp4测试文件]] | ||
| + | |- | ||
| + | |3 || VirtualBox加载Ubuntu || <!--[[VirtualBox加载Ubuntu|【'''打开查看'''】-->【'''打开查看'''】 | ||
| + | |} | ||
===FAQ=== | ===FAQ=== | ||
| 第531行: | 第574行: | ||
--> | --> | ||
| − | + | <span style="border:1px solid #000; text-align:center; float:right;padding:6px;"><strong>上一页:</strong> [[SMonitor 开发基础|上一页]]</span> | |
| − | <span style="border:1px solid #000; text-align:center; float:right;padding:6px;"><strong> | ||
|| | || | ||
|} | |} | ||
2023年9月3日 (日) 09:42的版本
|
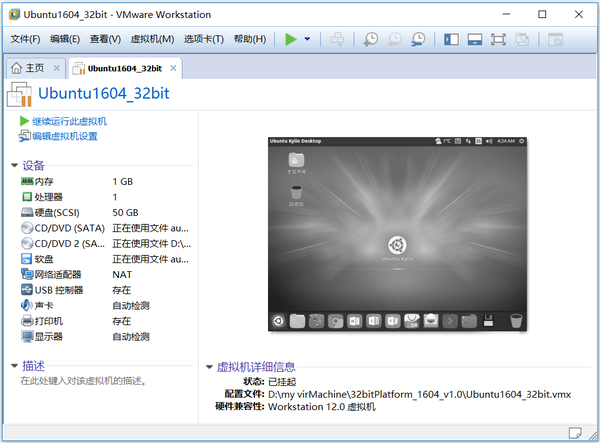
正文 目录vmware软件安装软 件 包:VMware-workstation-full-12.0.0.zip 操作系统:windows-7/8/10 安装过程: 如下所示 准备工作1 在d盘创建一个temp目录
2 将VMware-workstation-full-12.0.0.zip拷贝到temp目录
3 解压VMware-workstation-full-12.0.0.zip
开始安装
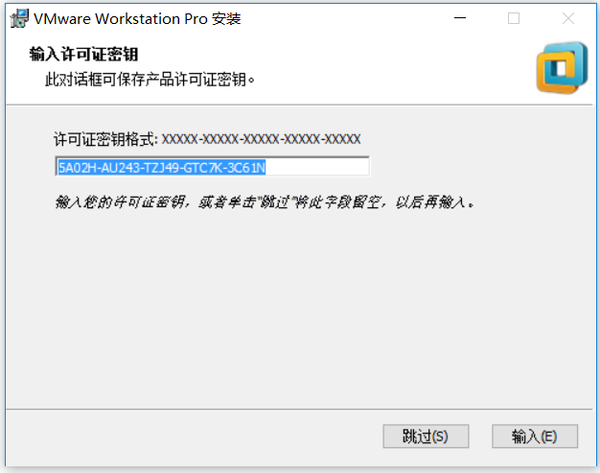
安装密钥
【VirtualBox加载Ubuntu||VirtualBox加载Ubuntu】 ubuntu安装配置软 件 包:64bitPlatform_1604_v5.0.zip(也可能是其他版本) 操作系统:windows-7/8/10 安装过程: 如下所示 安装ubuntu系统
可以看到64bitPlatform_1604_v5.0目录,即为ubuntu16.04的系统镜像,可以直接使用。
运行ubuntu系统
可以看到一个“挂起状态”的ubuntu16.04系统。
正常进入“ubuntu系统主界面”。
至此,整个ubuntu1604系统安装完毕。
设置共享目录共享目录主要是用于实现windows与ubuntu两个系统之间的数据交互,比如windows有一个文件要给ubuntu系统用时,就可以将文件放置到共享目录下传给ubuntu。 新的共享目录可以如下配置:
# ls /mnt/hgfs 可以看到没有名为shareWin的目录文件,接下来做如下操作:
# ls /mnt/hgfs
# cd /mnt/hgfs/shareWin/
# ls
发现在/mnt/hgfs目录下,多了一个名为shareWin的目录文件,再进到里面可能看到之前创建的hello文件。 至此,两个系统间的共享文件夹设置并启完毕,后面如果两个系统需要共享资料时,可以将其放到共享目录即可。
网络配置连接
注意:必须设置为桥接方式。
如果可以ping通百度,则网络配置成功。
shell命令简单使用shell终端打开点击mouse右键,选中”open terminal”,打开shell终端。 或者同时按下“ctrl + alt +t”快速打开
gec@ubuntu:~$
~ :家目录 /home/gec
root@ubuntu:~#
常用shell命令此处略
实践操作
# mkdir /opt/shell_test          //在opt目录下新建一个名为shell_test文件
# ls /opt/shell_test             //查看/opt/shell_test目录
# cd /opt/shell_test             //进入/opt/shell_test目录
# mkdir hello			 //新建一个名为hello目录
# ls                             //查看当前目录内容
# rmdir hello                    //删除hello目录
# ls
# touch hello.c                  //创建一个hello.c文件
# ls
# rm hello.c                     //删除hello.c文件
# ls
# mkdir hello
# touch hello/hello.c 	         //在hello目录下新建一个hello.c文件
# touch world.c                  //新建world.c文件
# ls
# rm -rf ./*                     //删除当前目录下所有文件
# ls
# cd /opt/shell_test                    //进入/opt/shell_test目录下
# touch hello.c                         //新建hello.c
# ls
# chmod 777 hello.c                     //修改hello.c文件为可读写
# ls

# cp hello.c hello_backup.c  -rdf       //将hello.c拷贝保存为一个新文件hello_backup.c
# ls

# mv hello_backup.c 123.c               //将hello_backup.c改名为123.c
# ls
# mkdir test
# mv 123.c test                         //将123.c文件移到test目录下
# mv test smartHome                     //将test目录改名为smartHome
# ls
# tar cvfj smartHome.tar.bz2 smartHome  //将smartHome目录压缩为smartHome.tar.bz2文件
# ls
# rm -rf smartHome
# ls
# tar xvfj smartHome.tar.bz2            //将smartHome.tar.bz2文件解压为smartHome目录
# ls
# cd /opt/shell_test
# rm -rf ./*

# touch hello.c
# vi hello.c
可以进入文件中,按下i,就可以编辑内容

#include <stdio.h>
#include <unistd.h>
int main()
{
        while(1)
        {
                printf("hello world.\n");
                sleep(1);
        }

        return 0;
}

按下Esc,退出插入模式,再输入
:wq!  (保存退出)

# gcc hello.c -o hello        // 将hello.c编译为hello
# ./hello                     // 执行可执行文件hello
动手实践
FAQ上一页: 上一页 |